
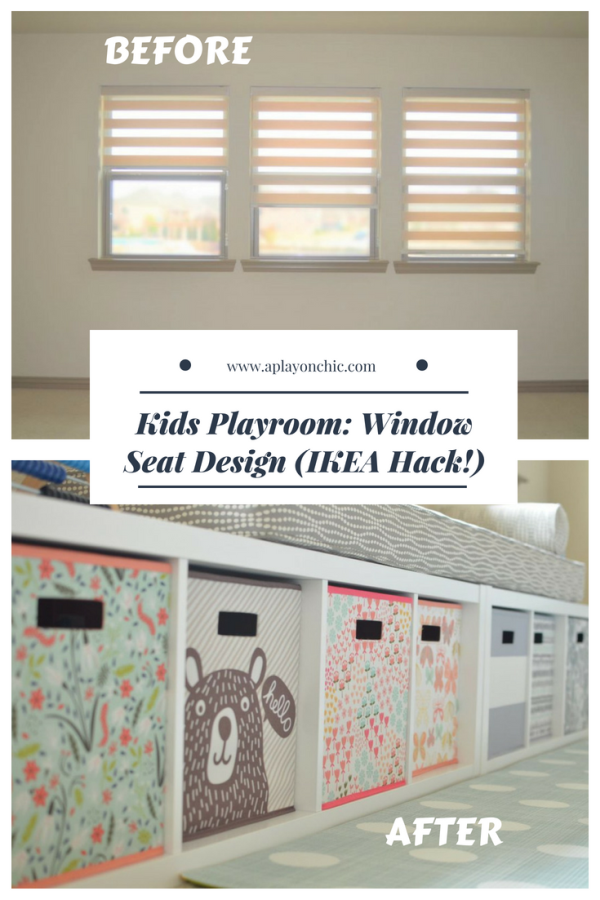
Kids Playroom Design: Window Seat (IKEA Hack!)
This post contains affiliate links, meaning, at no cost to you, I will receive a small commission if you make a purchase through the link - please see my full disclosure policy here.
Hi everyone!
Sometimes...just sometimes, after you have a baby, things change in your house, you know? The ideas you had for your home, the furniture you were going to buy, the decor you had envisioned, the style you wanted to incorporate...ALL...HAS...CHANGED.
After I had my daughter, I tried really hard not to let this tiny, little innocent baby take over my house, but inevitably, she has slowly started taking over parts of the house piece by piece, including our upstairs family room. My original plan for the family room has now evolved to be more suitable for...well, the whole family, and I guess that includes the kid. When I started designing this room a few months (or was it a year) ago, I had no vision and was lost on how I was going to design this room.
In an earlier post, we talked about how to design a room when you don’t have a vision yet. There are 7 questions that I subconsciously ask myself to organize and structure my thoughts in order to build a vision for my design. Join me as I walk through my thought process in this design! Here is my blank slate to start.

1. What is the purpose of this room or space?
Well, the original purpose of this room was an upstairs seating area that may or may not have involved a bar table, where my guests and I can enjoy some (alcoholic) beverages while chatting, playing games, and enjoying the view from the windows. But after my daughter was born, this space has morphed into an area where my daughter can play without disrupting all of the other areas in the house.
2. Who is your target audience?
This room will need to work for my daughter and maybe kids in general in case we're ever brave enough to take on another one. However, since I (or my husband or the grandparents) will need to supervise the kid(s) at all times when she is up here, the space will need to work for us, (pretend) adults, as well.

3. How will this space be used?
This space will be used as a playroom, as well as a storage area for all of my daughter’s toys and books, so that we can hopefully keep all of her toys contained in one area of the house… This space also needs to work for ME and other adults! Can you see my vision that includes some bar stools with a countertop or table facing the windows, so we can have mimosas while enjoying the view? Maybe it sounds more suitable for life before kids.
4. What are your goals and must-haves for this space?
Since the room will mainly be used by kids, I wanted to incorporate lots of color without it being too much.
Lots of storage
We are blessed to have a great view from these windows, so I wanted to add seating for kids and adults to be able to enjoy the view.
A design that doesn’t require a lot of time and effort to implement, in other words, quick and easy HACKS

5. How do you want your target audience to feel when they are in this room?
Since my daughter will spend a lot of time in this room, I hope that she will feel happy and excited when she comes into this room. More importantly, I hope that by having a bunch of toys and entertainment available to help burn off all of that energy she has, she will be able to take a nice lonngggg nap later. Haha. As for me, I hope to just not. feel. stressed. by the mess and clutter when I’m in this room. That’s why I decided to experiment with COLOR, add storage options, and just make the room aesthetically pleasing to [my] eye.

6. Start with One Item and Branch out from there.
Even though I’m building a vision for the playroom as a whole, in this particular post, I am starting with and focusing on this wall of windows because it seemed like an easy, central place to build the design off of.
**Light bulb moment: Window Seat + Toy Storage ← Vision for the wall!**
7. What is your budget?
My budget for this particular side of the playroom was $700. I know that this might sound a little steep, but trying to incorporate seating and storage will drive up the costs very quickly. Through this process, I discovered that custom window seat built-ins are NOT cheap. I wasn't so sure about spending thousands of dollars on a custom built-in only to have my kid happily destroy it. Enter IKEA HACK!
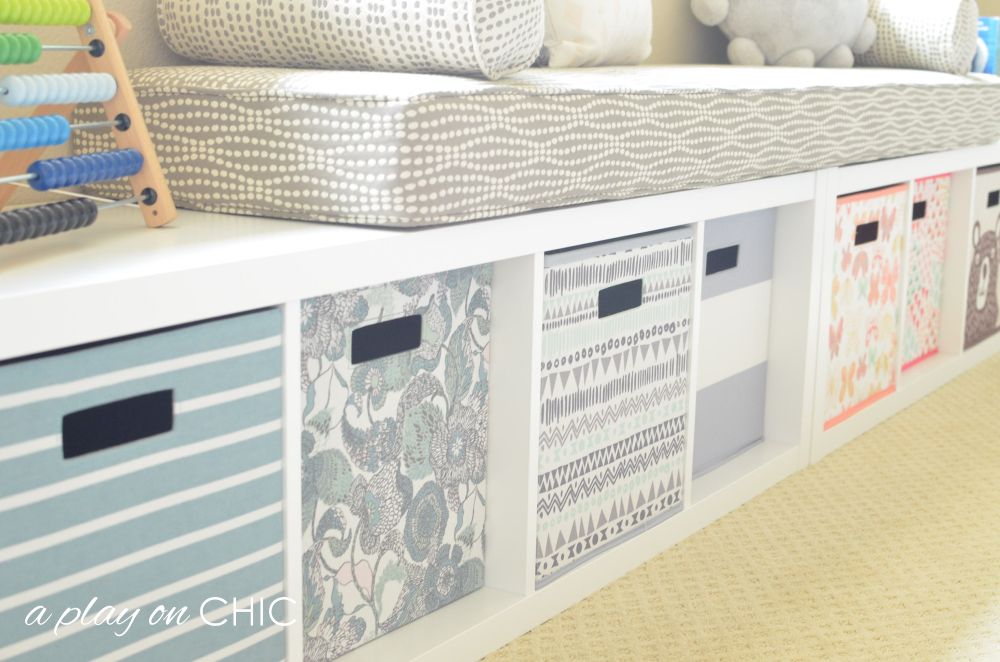
I was looking for very specific bookshelves that had the potential to work as a window seat base. I shopped different sites for affordable options where the measurements would work for this wall and windows. That's when I discovered the IKEA KALLAX shelving unit in white. The length of two of these 4x1 shelving units would fit perfectly underneath this set of windows. The height was just low enough to function as a seat base. The depth was a little shallow at 16.5 inches, but hey, for a hack, this worked for me!

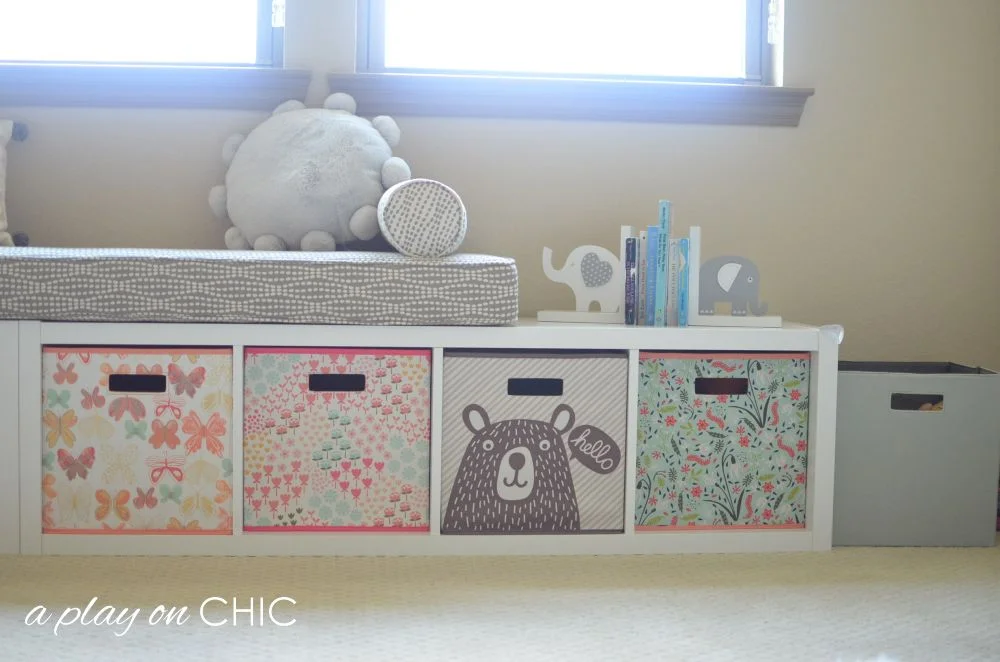
(Sorry the books are all chewed up, but pretty much all of my daughter's books look like this...I think it adds character...ha)


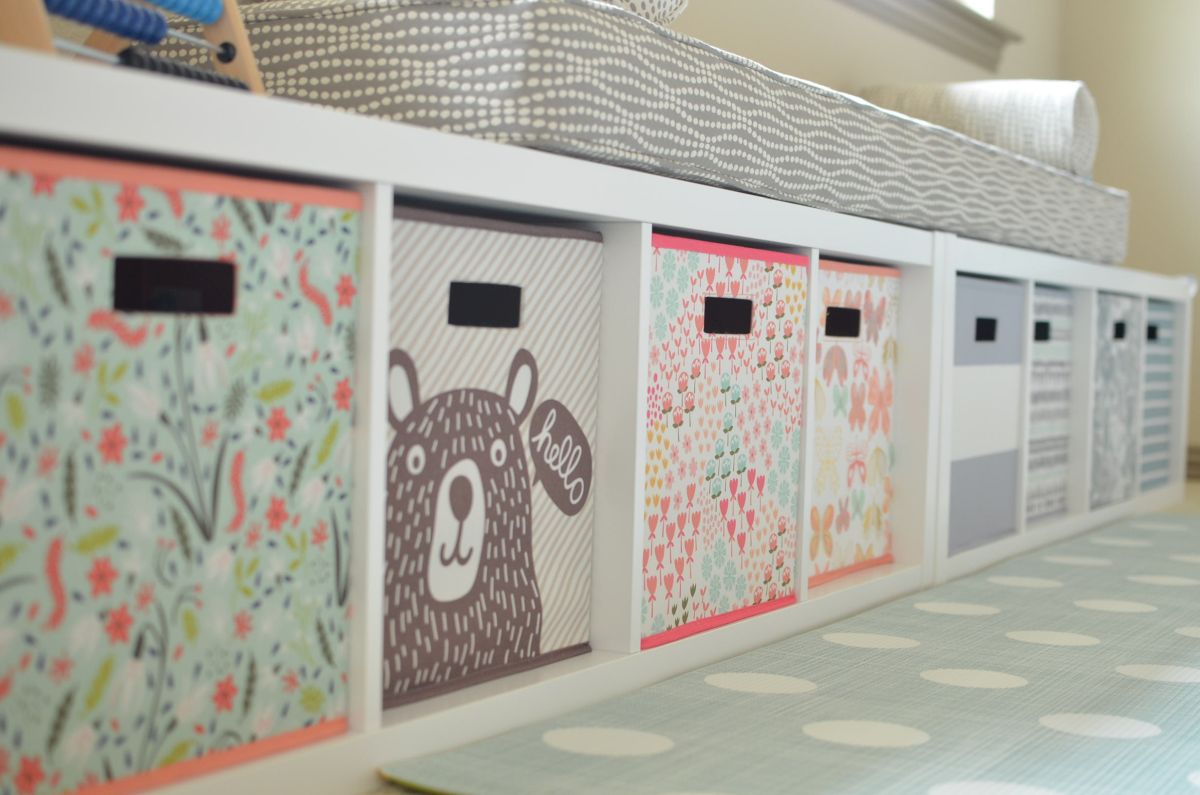
Next, I thought in order to make this space bright and playful for my daughter, I needed something super colorful to use as STORAGE for this window seat. I searched for 13" cube drawer inserts that would fit in the IKEA Kallax shelves, and I found the most adorable ones with a variety of designs to choose from at Target!


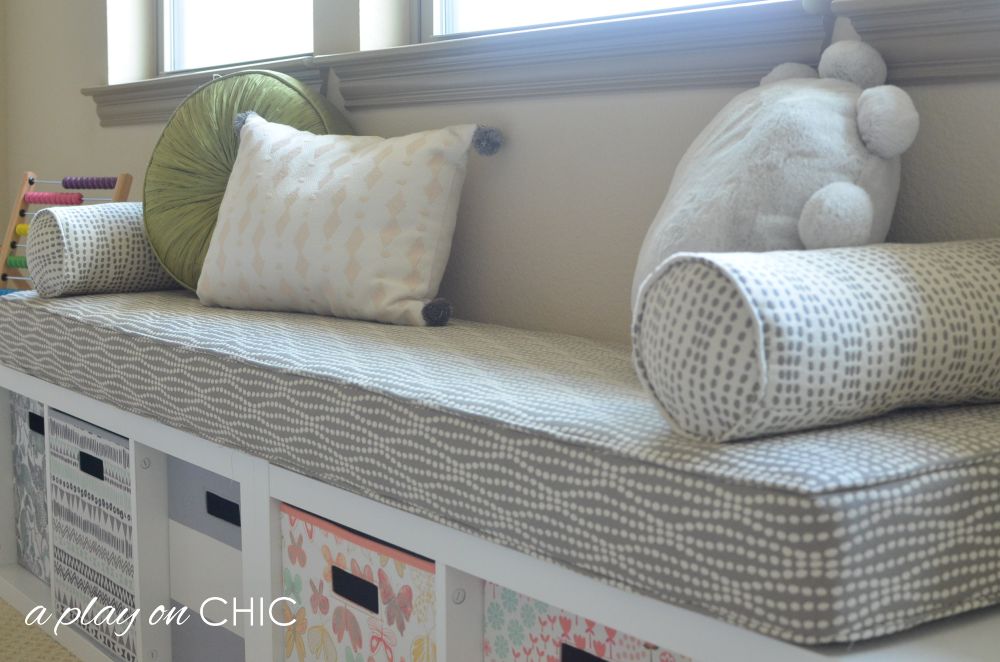
Next, I found a high density seat cushion foam similar to this one for a reasonable price. I preferred a thicker cushion in hopes that it wouldn't flatten too quickly, so I opted for a 4" thick cushion. This cushion is pretty comfortable. (I would know because I slept on this foam "mattress" temporarily in my baby's room one night because there was no bed in her room.)

Lastly, I shopped around for some fabric and chose a quieter neutral fabric in hopes that it doesn't clash with the colorful cube drawer inserts. The fabric I chose happened to be reversible, so I had 2 cylinder pillows made in the reverse pattern to compliment the seat cushion.
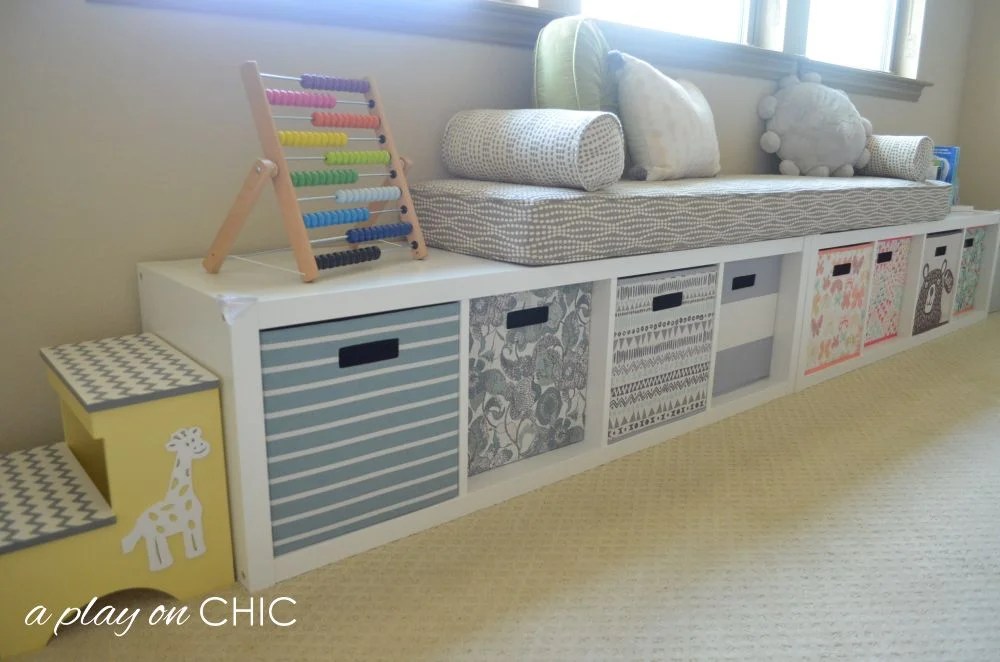
Most people would probably have two seat cushions that measured the exact length of each of the shelves because that was my initial thought too. The more I thought about it, the more I thought that was too predictable. Try to picture this with me - if there were two seat cushions that covered the entire length of the shelves (which is almost 116" wide), I think it would make the space feel bulkier, heavier. So rather than getting 2 foam cushions, I used the entire length of one 72" foam cushion (which is not small because it's longer than me and many of you I'd guess, AND I saved money because I didn't have to buy 2 of these). The different elevations of the cushion and the seat base created an extra layer of dimension to the window seat for decor (or toys)!
I'm pretty happy with the way it turned out, as I was able to incorporate all of my must-haves; it was functional for the kid and for me; and it was a decent amount below my budget, WAY more affordable and colorfully energetic than a custom built-in window seat.
***Check out the cost breakdown and my takeaways below!***
Breakdown of Costs
2 Ikea Kallax 4x1 Shelf Unit at $45.99 each: $92
8 Target 13” cube drawer inserts at $9.99 each: $80
1 Seat Cushion 4” Foam: $50
2.5 yds of Joann’s Fabric for Seat Cushion at 50% off $49.99/yd: $63
Manual Labor to Make Seat Cushion: $87
Pillows (approximate): $55
Elephant Book Ends (Home Goods): $10
Total = $447

Takeaway #1: Sometimes a little bit of organization of your thoughts will lead you to the vision you were seeking for your design.
Takeaway #2: Whether the varying elevations of the design was accidental (because I didn't want to have to order 2 foams) or intentional (because I didn't want to do the predictable), exploring design ideas that are not expected can help you exercise your design capabilities and discover your design style.
Takeaway #3: I'm beginning to realize more and more that layering plays such a big role in design (both fashion and interior). Layering brings out different dimensions of a space, highlights contrast, and can add a unique, refreshing perspective to create a more dynamic design.
Thank you for reading!
You May Also Like:


When I am hosting guests, I like to put in some effort to make them feel comfortable in my home. Now that’s not to say you have to stress yourself out and go all out to do everything you possibly can for your guests. We all have too much going on in life these days to guilt trip ourselves.